Step 1: Install the Template
We’ll use a template from Vercel to speed things up.
1. Clone the repository
git clone https://github.com/Wisp-CMS/nextjs-blog-cms-wisp.git2. Install dependencies
npm install --legacy-peer-deps3. Setup environment variables
Copy the example environment file:
cp .env.example .env4. Run the development server
npm run devStep 2: Create a Notion Integration
To allow your app to access Notion data, you need to create an integration.
- Go to: https://www.notion.so/profile/integrations/internal
- Click “New integration”
- Fill in:
- Integration name (e.g. Blog Post)
- Select your workspace
- Click Create
- Copy the Internal Integration Secret (you’ll use this later)
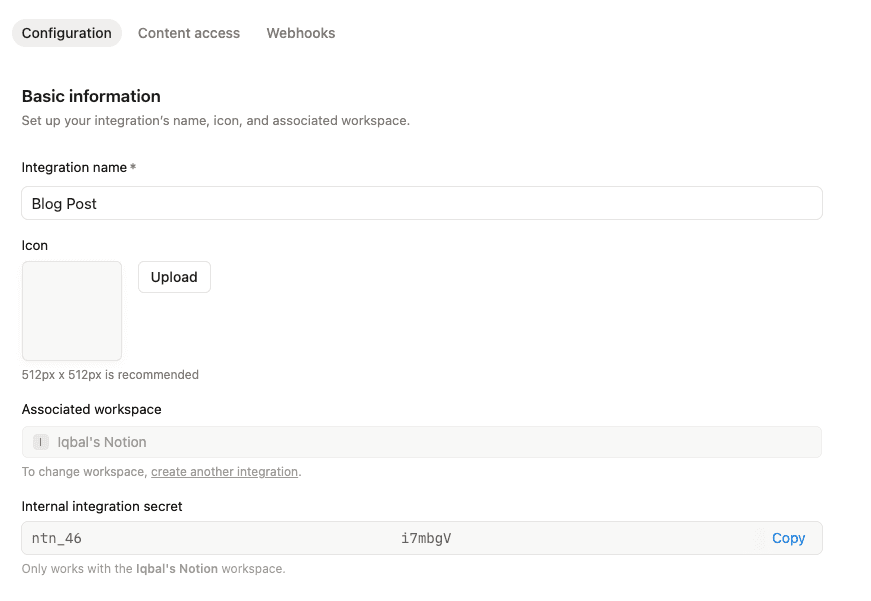
Step 3: Create a Database in Notion
Next, create a database that will store your blog posts.
1. Create a new page
- Create a new page in Notion where your blog content will live.
2. Add a database
- Add a “Database – Inline” block.
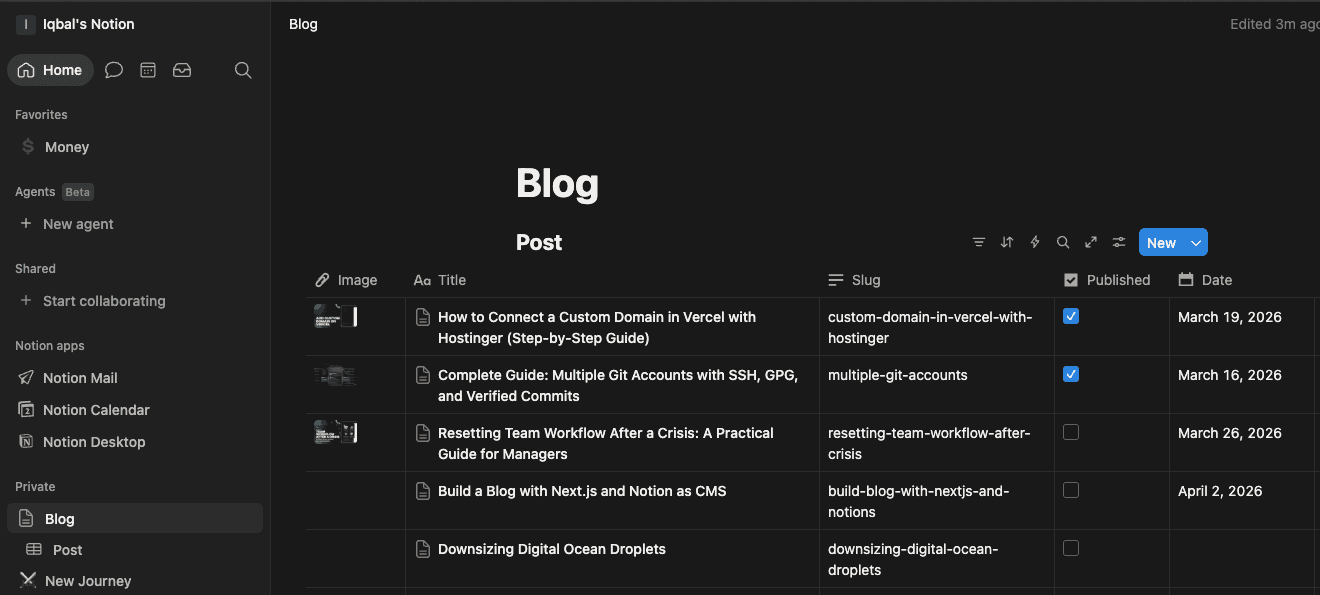
3. Setup Required Columns
- Make sure your database has the following columns:
- Image (Files & media) — Cover image for the blog post
- Title (Title) — Blog post title
- Slug (Text) — URL-friendly slug (e.g.
my-post) - Published (Checkbox) — Control whether the post is visible
- Date (Date) — Publish date
- Tag (Multi-select) — Categories or tags for the post
- Important:
- Column names should match exactly (case-sensitive depending on your code)
Slugmust be unique for each post- Only posts with
Published = trueshould be displayed
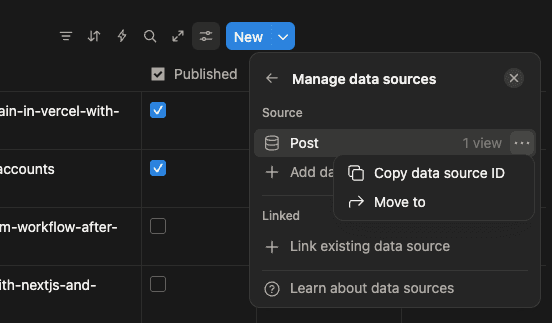
4. Get Data Source ID
- Go to Settings → Manage data sources
- Copy the Data Source ID
You’ll use this ID to fetch posts from Notion.
Step 4: Connect Database to Your Integration
Now, connect your database with the integration you created earlier.
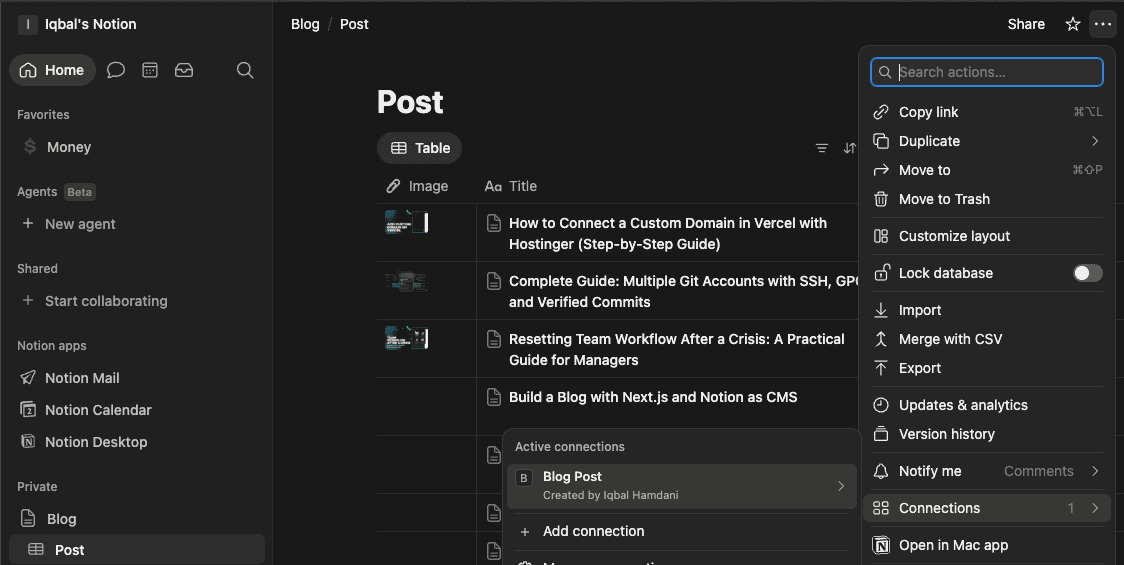
- Open your Database – Inline page (not just the page, but the database itself)
- Click the three dots (⋯) in the top right
- Go to Connections → Add connection
- Search for your integration name (e.g. Blog Post)
- Select it
Now your integration can access the database.
Step 5: Update the Template to Use Notion
The template originally uses Wisp CMS, so we need to switch it to Notion.
Option 1: Follow code changes
- You can check this commit to see what needs to be modified:
https://github.com/miqbalhamdani/blog/commit/cd2d9792aca72aa69b2c05a06d329fce374d7bechttps://github.com/miqbalhamdani/blog/commit/cd2d9792aca72aa69b2c05a06d329fce374d7becOption 2 (Recommended): Use a ready fork
- To save time, you can fork my repository and just update the environment variables.
Update your .env file
NOTION_TOKEN=ntn_xxxxxxxxxxxxxxxxxxxxxxxxxxxxxxxxxxxxxxxxxxi7mbgV
NOTION_POSTS_DATA_SOURCE_ID=xxxxxxx-xxxxxx-xxxxxx-xxxx-xxxxxxx
Explanation:
- NOTION_TOKEN → Your Internal Integration Secret (from Step 2)
- NOTION_POSTS_DATA_SOURCE_ID → Your Notion database ID (from Step 3)
🎉 You're Done!
Now your blog is connected to Notion 🎉 You can:
- Write posts directly in Notion
- Manage content easily
- Use Next.js for fast performance and SEO